
We're trying to get back to simple pleasures with the kids, which means board games, puzzles, make believe, stories and timeless toys. Stick horses used to be a staple in any child's toy treasury and our kids do really love pretending to gallop around our apartment on their "horses". So when a friend's little boy was having a birthday and I knew he loved horses, I thought a stick horse would be the prefect gift. To find out how to make your very own stick horse with my free pattern and directions, click below.
First start by downloading my free pattern here.
Next gather your supplies:

- 1/2 metre heavy duty fabric (upholstery fabric works great, for this horse I used a linen blend)
- 20 cm x 100 cm pleather
- 1 ball of wool yarn
- co-ordinating thread
- 2 x small black safety eyes
- 2 x large safety eyes
- 2 x jean fasteners
- fishing line
- 500g bag of stuffing (batting)
- Stick (I used the stick off a new rake)
Step 1: Cut out your pattern pieces from the template and following the directions on the pattern, tape the correct pieces together.
Step 2: Cut of the fabric pieces:
2 x horse head/neck piece
1 x head gusset
4 x horse ear
Step 3: Pin and Sew the two head/neck pieces together (if using fabric with a right and wrong side, make sure to sew right sides together) from the tip of the nose, along under the chin and then continue along to the front neck seam.

Step 4: With right sides together, insert and pin the gusset, at the tip of the nose and along the top of the head. Begin sewing at the bottom of the gusset (at the neck) and around to the nose and back down the other side to the neck starting point.
Turn right side out.

The gusset should look like this once inserted and sewn.

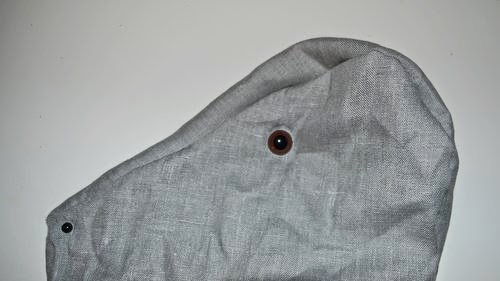
Step 5: Add the nostrils (small back safety eyes).

Step 6: Add eyes (large safety eyes).
Step 7: Stuff the horse head with batting until 3/4 full.
Step 8: Cut a piece of cardboard 33 x 33 cm (a cereal box would work). Wrap the yarn around the cardboard until you have about 1/2 the ball of yarn on the cardboard.
Step 9: Place the cardboard right up next to the foot of your sewing machine and slowly push off the yarn from the top and bottom of the cardboard, pushing it under the sewing needle foot and stitch down the middle. Continue to gently push the yarn off the cardboard and push it under the sewing needle until all the yarn in off the cardboard.
Step 10: Place the yarn mane onto the horse head in a position that you like, bunching it up to the desired thickness. Once you're happy with it, pin the mane in place and hand sew it onto the horse head.
Step 11: Cut the looped ends of the mane with scissors.
Step 12: Pin and sew the ear pieces right sides together. Turn right side out and hand sew them onto the horse head by folding them in half, sewing the halves together, then sewing the ear onto the head.


Step 13: Cut 3 strips of pleather and braid the strips together. Wrap around the nose of the horse and around the back of the head, secure with the jean fasteners.


Step 14: Grab your stick and carve two notches in it, all the way around. I used a saw for this part. The bottom notch gives the horse neck something to grab onto.

Step 15: Using left over fabric and batting, make a round mound and secure it to the top notch using fishing line. This will ensure that the horse head doesn't move around on the stick.

Step 17: Wrap fishing line around the bottom of the horse head to secure it to the bottom notch on your stick.

Step 18: To finish it off, add (hot glue) a piece of pleather to hide the fishing line and loose fabric.

Hi Ho Silver!

love this!
ReplyDeleteHi! Do you have any photos of step 8-10? I'm a bit of a beginner and struggling to picture what I should do. Thank you. :)
ReplyDeleteI can't get the pattern download to work but I'd love to make this for christmas! do you happen to have another link? Thank you!
ReplyDeleteHi, I cant down load the pattern and I would love to make this for my daughter, who is a teacher, to use in her lessons
DeleteThis is a wonderful idea for keeping kids entertained.
ReplyDelete